
A blog series on pre-washing quilt fabric:
- Part 1: 8 Top Reasons Quilters Should Prewash (Read below)
- Part 2: 8 Top Reasons Quilters Don't Need to Prewash
- Part 3: Prewashing Fabric: How to Decide Which is Right for YOU!
I often get asked the question about whether or not to pre-wash fabric before starting a quilt project. I definitely have an opinion and if you can't figure it out by the end of part 2, I will spell it out in part 3!
There are compelling times when it may be better to wash your fabric or not to wash. Read on to find out...
Fabric prewashing lesson learned
- I didn't prewash fabric for the first year of my quilting journey and I definitely paid the price. When it came time to wash my first quilt, the various fabrics in the quilt shrunk at a different rate! (Of course, I didn’t know to buy quilt-shop-quality like CCQs fabrics at that time.) Instead of the soft fluffy look I expected, it came out of the dryer in a bunched-up appearance and there was no taming it. Can you hear the violins playing?
- I got smarter over the years and started prewashing most of my fabrics (see exception in part 2 of this series). My second fiasco was when I was designing a block-of-the-month (BOM) for a quilt store. I quickly pre-washed the fabric; but only once as they wanted the quilt in the store yesterday (figuratively speaking). In the last 18 months a pipe burst from the cold winter temperatures-not once but two different times! Needless to say, it is very hard to get home insurance now. The second time all the water running out of the pipe landed right on top of the bed where I store my finished quilts (including the BOM). Most of the quilts survived, but not the BOM.

The red (notorious for bleeding) managed to find its way onto the cream fabrics in the quilt. This happened even after prewashing. Actually, this is not technically a case of bleeding; but a case of crocking. If you want to know more from Apparel Search, check out crocking here;.

Reasons to prewash
-
Shrinkage: It’s a fact of life that fabric shrinking will occur whenever you wash the fabric (before starting the project or after the quilt is finished).
Preshrinking the fabric before starting a project allows you to somewhat control for minimal shrinkage during the washing of the finished quilt at a later date. If you want a smooth flat finished quilt, preshrinking fabric is a must. This sure would have been useful in my violin story above!
Fabric shrinking happens at different rates with different fabrics (especially if they are from different manufacturers) and this is a way to equalize the playing field.

I prewashed fabric for my new pattern Daydream Blossoms. You can see how much the washed panel (on the left) shrunk compared to a non-washed panel (on the right). Hop over to my tutorial “15 Innovative Ways to Use Fabric Panels” to see how I fixed the problem. -
Bleeding: Prewashing can minimize color bleeding when a completed quilt needs to be washed in the future. In the washing process, some of the excess dyes (especially reds and purples) adhere to adjacent fabrics and leaves a stain.

This is what is known as “bleeding”. Prewashing fabric doesn’t always guarantee that fabrics won’t stop bleeding, so you may want to use one of the products below to aid in removing excess dye from the wash load. -
Fusing: When you use a fusible product with your fabrics (for instance raw-edge-fusible applique), prewash so that your fusible adheres to the fabric and performs to its’ best ability. (This reason is my personal favorite as many of the Colorado Creations Quilting landscape quilt patterns use fusible.) You can pick up fusible products in our notions area.
-
Eliminate Odors: Prewash fabrics to eliminate odor (such as smoke and gas smells). Gas you ask? Let me tell you a story. A missionary from the Congo in Africa came over and was talking about how the oppressed women were trying to make a better life for themselves with their “quilting” (it actually looks like extraordinary embroidery to me).


So the story pulled at my heartstrings and I purchased two “quilts” from the missionary that day. When these quilts arrived in the mail, they had a strong gasoline smell. It took about a month of airing them out to get rid of the smell! I did a hand wash to help. -
Eliminate Allergy Triggers: Prewash fabrics to eliminate allergy triggers, skin sensitivity or respiratory issues to the chemicals instilled in the fabric during the manufacturing process (i.e. pet hair or chemicals such as sizing used in the manufacturing process).
-
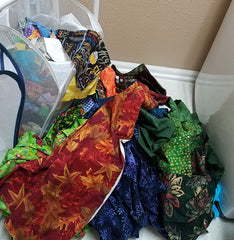
Unknown Origin: You just don’t know where the fabric's been. (You’ve picked them up at a garage/estate sale or thrift store.) I recently went to the “Junk in the Trunk” quilter’s garage sale at my local quilt shop. Not too sure where some of this fabric had been stored but look at the stash I brought home! It didn't smell great, so into the washer it went.
-
Straight of Grain: The pre-washing fabrics removes the hard crease (fold) on fabric that just came off the bolt. Many times, the fabric is “off the straight of grain” when it’s rolled onto the bolt at the factory. After washing you’ll be able to fold the fabric and cut strips perfectly on the grain.
-
Mixing Fabric Types: If you plan on mixing flannels and regular cotton in a quilt project, I’d suggest prewashing all of the fabric as flannel seems to shrink quite a bit more than cotton. (That’s why people like to use flannel to make chenille and “rag” quilts.)


Steps for prewashing fabric
I checked several of the bolts of fabric from various manufactures in my “shop". Most suggested to wash in cold (a few stated warm) water on a gentle cycle and then dry (low temperature setting) or just iron (no dryer). That being said, this is how I pre-wash my fabrics:
- Sort the colors (lights and darks) just like your mom taught you! You can go further and sort batiks from printed cottons as the batiks seem to bleed even more.
-
Wash in cold (my preference) or lukewarm water as water temperature plays a large part in bleeding and shrinking. You can add a gentle soap such as Quilter’s Rule Quilt Soap
 (a.k.a. Orvus Soap).
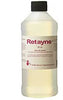
Here’s a great post to read on the subject of quilt soaps by Generations Quilt Patterns. - I don’t personally use soap or Retayne,
 as I want to get out all chemicals for skin sensitivities in my family. Avoid fabric softeners (both washer and/or dryer) as they tend to make rotary cutting more challenging. I do throw a dye color trapping sheet into the wash though. (More to come in the 3rd post in this series on dye catchers.) If the color catcher sheet comes out a deep color indicating heavy color bleeding,

I will run the load through the washer a second time with a new sheet until the sheet is lighter in color. Unfortunately, dye in the wash can adhere to another piece of fabric even with these sheets in the wash.
In this case I can usually work around the spot and still use the fabric. Worse case, I don’t use the piece of fabric; at least I didn’t spend many hours making a quilt and have dye migrating to the lighter color fabric in the quilt with a later washing. - Once washed, I put the fabric in the dryer and tumble dry on a low heat setting for approximately 10 minutes just to help with a few of the wrinkles. The fabrics will come out damp (if you dry completely, the wrinkles will set obstinately into the fabric).
- I shake each piece out and either lay flat to air-dry or iron immediately.
 (a.k.a. Orvus Soap).
 as I want to get out all chemicals for skin sensitivities in my family. Avoid fabric softeners (both washer and/or dryer) as they tend to make rotary cutting more challenging. I do throw a dye color trapping sheet into the wash though. (More to come in the
So, if you don’t wash you’re thinking I’m crazy having to iron all that fabric! Actually, it’s a meditative process for me. Furthermore, a working Mangle (an appliance from the 1940s-50s) just fell into my life recently!
I feel like I should be wearing a fitted dress and pearls like Leave it to Beaver’s mother.

I just feed the fabric through the top

and then the pristinely pressed fabric comes out the bottom!

I can iron about ten yards in 15 minutes with this thing! Who knew old-timey appliances could be so fun! So many !!! Can you tell I love this thing!
PS Starch if you want to add that crispness and stability back to your fabrics.
Quilty Quote of the Day: 
Well that's my two cents’ worth and I'm sticking to it!
Tune in to my next blog post to see the other side of the debate in part 2 of this blog series. There's a FREEBIE involved! Also more detail is given on products mentioned above as well as guidance on deciding which side of the fence to be on in part 3 of this blog series.
Let me know if you prewash or not and why. Do you have a compelling reason to either wash or not that I haven’t addressed here? Comment below and feel free to share this blog (or Coloradocreationsquilting.com web site) with others.
Until next time, Happy Quilting,
Jackie V (‘cuz my computer hasn’t learned how to spell Vujcich)